Friday, January 30, 2015

Good Idea Card!


Hello & Happy Friday!

Today I want to share with you a card background that I created using Watercolour paper, Distress Inks and a Cheery Lynn Design Embossing Plate.

I absolutely love to create texture and depth on my cards.  This is a technique that I had fun doing and there are so many possibilities. Try a variety of embossing plates with  different colour combinations -the skies the limit!


I used the mini Distress inks for the convenience of the smaller pad. I could apply the inks directly to small sections of the Old Brick Embossing plate.

I then spritzed my Watercolour paper and my inked Embossing plate with water. I applied the Watercolour paper spritzed side down, on top of the inked embossing plate. I then ran it through my Die Cut machine on the appropriate settings for normal embossing. 


If you place a piece of paper towel under your Embossing plate while you emboss with your Die cut machine, it will soak up your excess water and you will have less mess to clean!

As you can see from the picture above, the embossed Old Brick shows up great!


I wanted a more dramatic look so I gently rubbed my Fired Brick Distress Ink over only the top embossed layer. I then spritzed with water to blend the Distress Inks.


I then repeated this last step with Walnut Stain Distress Ink. Above is a close up of the texture these steps created! Love it!


The card was made up from a variety of Cheery Lynn Dies. I created a Sweet William flower to bring the background colour to the forefront. I added silver paint to the music notes, gears and key to tie in my embossed stamped sentiment.


I also would like to point out the Border of Circle cut outs on the bottom of my card. That is from the New Release Deutschland Border Set. This border strip die cuts the small circles and also perforates a line of dots, above and below the circles for wonderful detail!

Dies Used:

Sweet Williams - D137


I hope you will play along in our weekly Cheery Lynn Designs Challenge 169 - Anything Goes. You could win a $20 shopping spree at the online Cheery Lynn Design Store.

Thanks for joining me today!

Take care,

Corina Finley
Live, Laugh & Create

Friday, January 23, 2015

Just be You Card


Hello!

This week, I wanted to create a card using the Cheery Lynn Designs New Release Rose and Leaves Set. 

The Rose and Leaves comes as a set of 3. The Rose is very versatile. A few of the Designers have used it as a vocal point on their cards, created pattern paper with only the Rose or have just used the detail leaves in their floral arrangement.


Above is a closer look! This die also allows you to adhere the outline of the petals to papers and bend the petals up to give depth and dimension to your flower. 


I also used a border from the New Release Royal Scandinavian Border Set. This also comes in a set of 3. Last week I used one from the same border set and I hope to use the remaining border from this set on next weeks card!

Dies used:

Royal Scandinavian Border Set (set of 3) - B524


I hope you will play along in our weekly Cheery Lynn Designs Challenge 168 - Sweethearts. You could win a $20 shopping spree at the online Cheery Lynn Design Store.

Thanks for joining me today!

Take care,

Corina Finley
Live, Laugh & Create

Friday, January 16, 2015

'Free Bird' Card


Hello! 

Last Friday, Cheery Lynn Designs unveiled their awesome January New Release!

If you have not checked them out, please take the time and head over to the website - to make it even easier - follow this link directly there! Cheery Lynn Designs.


I used the leaves from the Rose and Leaves (set of 3) die. These leaves have such a wonderful detail to them, they are a perfect addition to any floral arrangement.

My favourite aspect of this card is the band across the bottom. Using my die cut machine and one die from the Royal Scandinavian Border Set (set of 3), I cut the border in black cardstock. I then used light yellow cardstock, measuring 4 1/4 x 3/4 and placed the same die in the center and cut it out. I kept the negative pieces (the pieces that you would throw away). 

To assemble my band:

I fit one negative piece of light yellow cardstock to the top of the black die cut border and one to the bottom. Like puzzle pieces!

I then cut a piece of pattern paper to 4 1/4 x 1 1/4. I adhered the black and yellow border to the pattern piece with an even matte of pattern paper showing at the top and bottom but flush on both ends.


Thanks for joining me today!

Take care,

Corina Finley
Live, Laugh & Create

Friday, January 9, 2015

New Release! Ever Card

Today is the day! The New Release from Cheery Lynn Designs is released today, I am very excited for you all to see the wonderful New Dies!

I love the new Borders, the Card Frames are great to work with and the designs all have wonderful details!

You all will need to head over to the Cheery Lynn Designs website and take a look - must see!


I create this card for the New Release. I wanted to take a step away from the florals and Holiday Festive cards that I have been creating. This card has an edger feel - very Steampunk!


Please also take a look at the other creations made from the talented members of the Cheery Lynn Design Team. So many different styles and great ideas to inspire you!

New Dies Used:
B523 Deutschland Border Set (Set of 3)
DL294 Deutschland Boutique Stacker A2 Frame (Set of 4)

Previous Releases Dies Used:


I hope you will play along in our weekly Cheery Lynn Designs Challenge 166 - Winter Whites. You could win a $20 shopping spree at the online Cheery Lynn Design Store

Thanks for joining me today!

Take care,

Corina Finley
Live, Laugh & Create

Friday, January 2, 2015

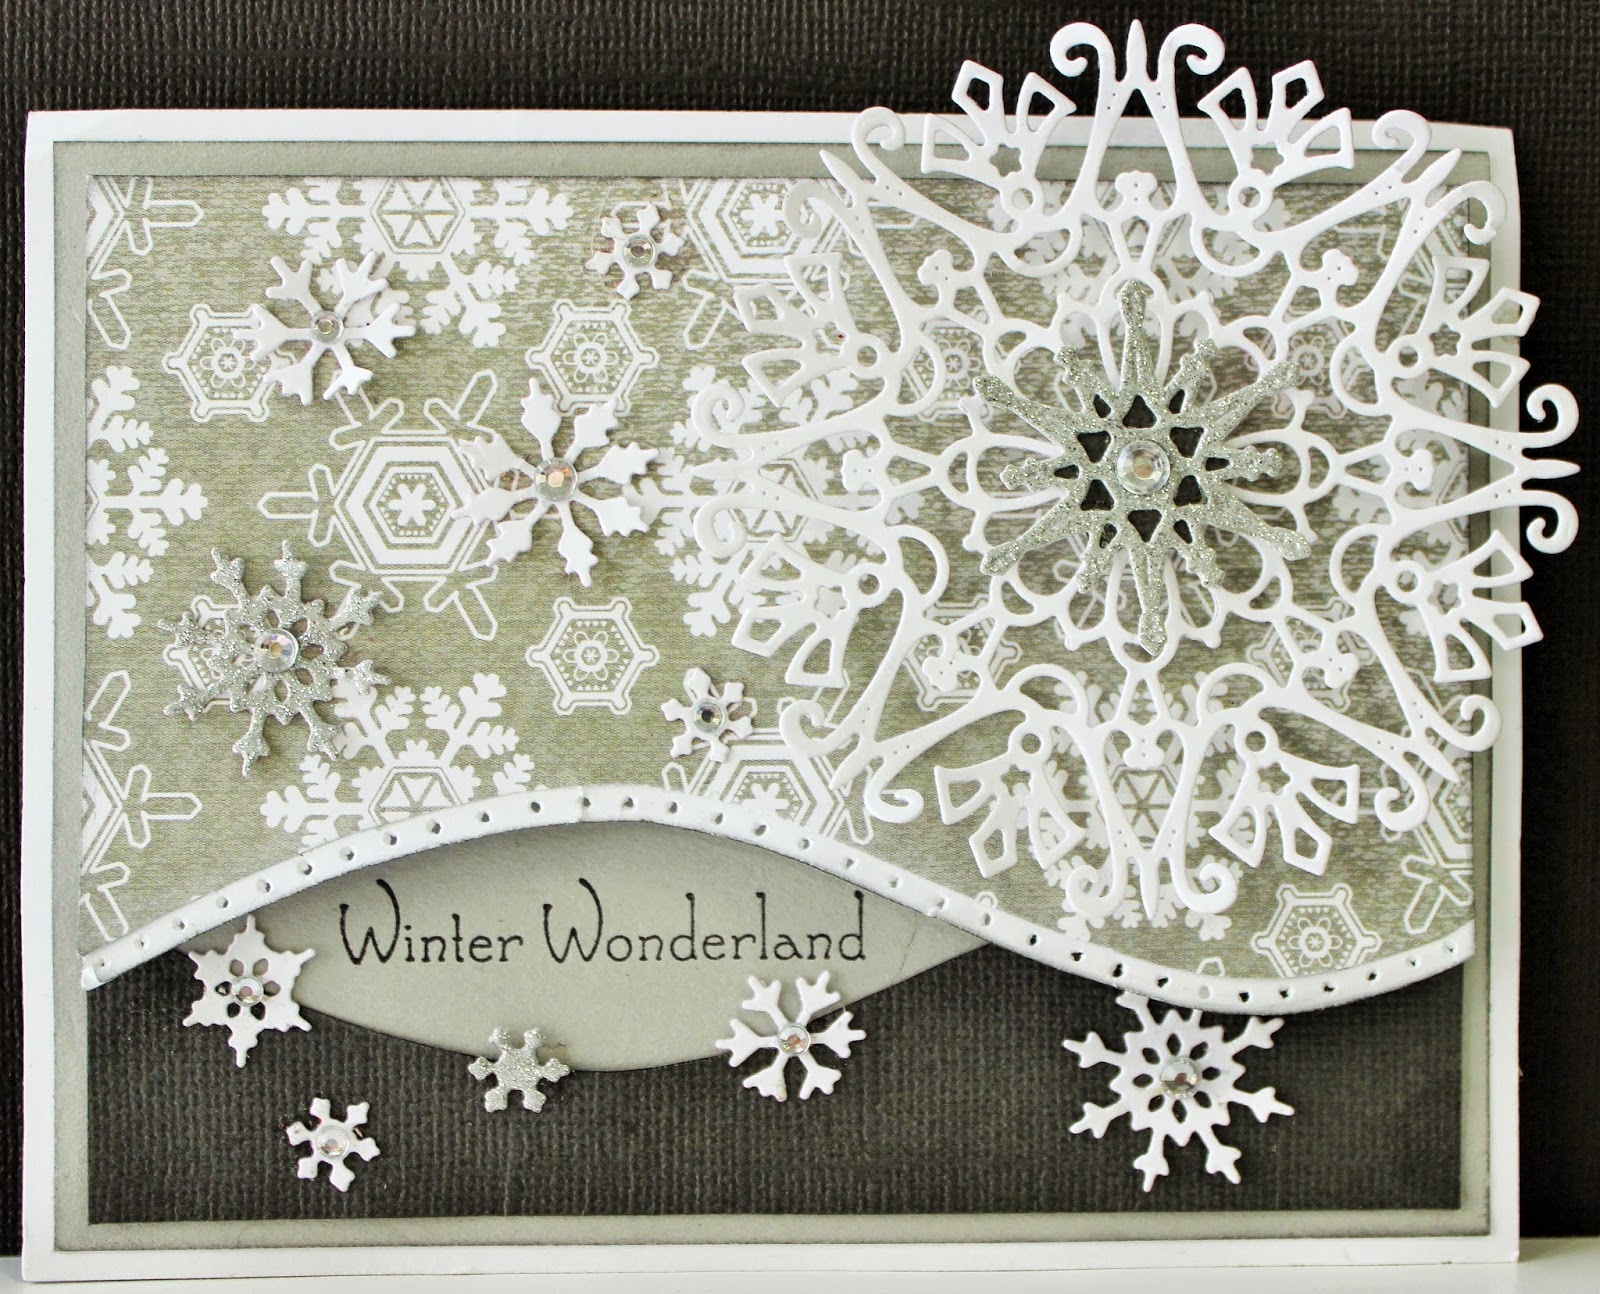
Winter Wonderland Card


Happy New Years! Wow it is 2015!

As I sit here and look outside, winter is absolutely here, the snow is gently falling. So to share a part of my beautiful surroundings, I created this Winter Wonderland Card.


I created this card using three snowflake die sets. My favourite multi purpose snowflake die that I think everyone absolutely needs to be in their collection is Snowflakes - C146

Image 1

As you can see, this die comes with various shapes and sizes of snowflakes so you always have the right style for your project. Love it!


The Snowflake Doily is a beautiful larger detailed snowflake die, measuring 3 1/4 in diameter. It always captures your attention with its elegance. I added foam adhesive to create depth, added one Snowflake from the Snowflower Set #1 and a rhinestone to the center.
 
Dies used:
 
I hope you will play along in our weekly Cheery Lynn Designs Challenge 165 - Thank You. You could win a $20 shopping spree at the online Cheery Lynn Design Store

Thanks for joining me today!

Take care,

Corina Finley
Live, Laugh & Create!