Showing posts with label Cheery Lynn Designs. Show all posts

Friday, June 24, 2016

Happy Thoughts.....

Hello!

I just want to start off by letting you all know that I will be taking a leave of absense. I need to focus on my family and families health.

With that said, lets get to today's card! 

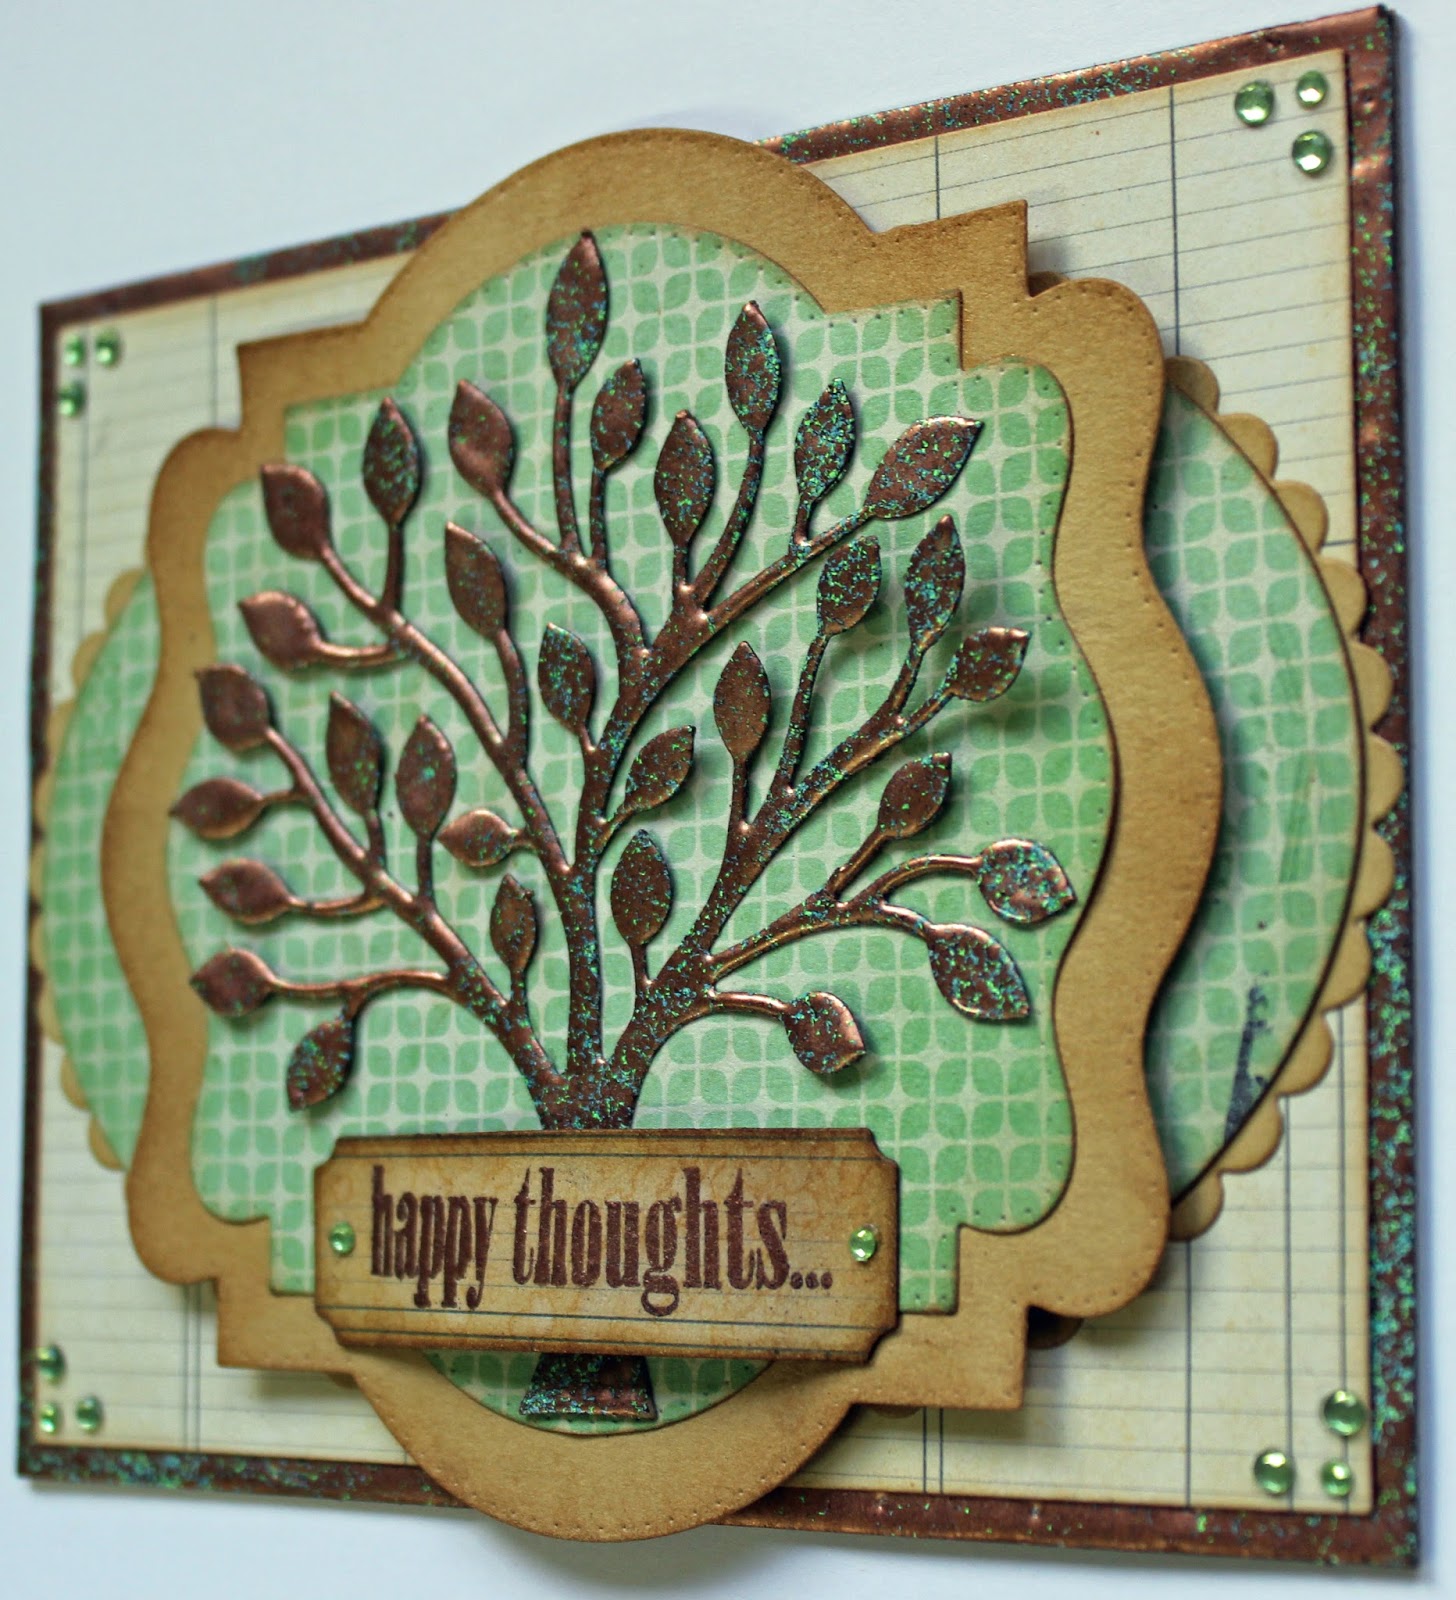
I die-cut the Whimsical Tree of Life (I am in love with the new Whimsical Tree of Life from the June Release! It will be great for all seasons themed cards!) from cardstock and heat embossed with Vintage Copper Frantage embossing powder.
I cut the A2 Frames Rectangular for the base from light weight chipboard and heat embossed the edges with Copper Vintage Frantage embossing powder. I matted the Lined pattern paper to the chipboard and used the A2 Frames Rectangular in one size smaller to cut it.

From Kraft cardstock, I cut the Pierced Stacker #3 and Scalloped Oval. I inked the edges with Vintage Photo Distress Ink. I then cut my green pattern paper with a smaller die from each of the two sets and matted them to the larger Kraft die-cuts.

I stamped my Happy Thoughts sentiment onto the Paris Signs 4, heat embossed with Copper embossing powder and trimmed the die-cut. Inked the edges with Vintage Photo Distress Ink. To accent, I added the green rhinestones to the sentiment and corners.
Whimsical Tree of Life Die - B798


I hope you will play along in our Cheery Lynn Designs ChallengeYou could win a $20 shopping spree at the online Cheery Lynn Designs store.

Remember that I am sending you 'Happy Thoughts' till next time!

Thank you for joining me today!
Take care,
Live, Laugh & Create

Wednesday, June 15, 2016

Cheery Lynn Designs Whimsical Delights Blog Hop!

Hello! 

Thank you for joining me and I hope you are enjoying the blog hop for the Cheery Lynn Designs June New Release Whimsical Delights!

If you are following Cheery Lynn Designs blog hop then you should have just came from Amy's blog: amyvoorthuis.blogspot.com and saw her beautiful creation!
To create my card, I cut a piece of Kraft cardstock with the Rectangle Stitch and Cut die. Then painted the entire panel with Robin Egg Blue acrylic paint. Once dry, I embossed the panel with the Wood Grain embossing plate. Using a sanding block, I removed the paint on the embossed area only - giving the panel a two toned look. I layered this onto a Java Brown card base.
Above you can see a close up on the new Whimsical Owl Die. He has been cut from Core'dinations cardstock and roughly sanded to reveal the great detail.  I used two jeweled brads for the eyes. 

I decided to add the nest under the owl from the Bird Nest And Eggs set. I also used the core'dinations cardstock for it. For the top of the nest, I cut it out twice from Kraft cardstock and applied some Patina glitter glue with my finger tip for some sparkle!

The Pierced Banner sentiment was cut from Kraft cardstock and roughly painted with Robin Egg Blue acrylic paint. Once dry, I stamped and embossed in black. I then added the same Patina Glitter Glue to the letters.
New Release Dies used:

Cheery Lynn Designs - Whimsical Owl Die - B789

Previous Release Dies used:

Rectangle Stitch and Cut Tool - LG Silver Stitch Tool - LSC-16


You are going here nextGinny @ pollyspaper.wordpress.com

Remember to leave a comment at the end (I love comments too!) of the Blog Hop on the Cheery Lynn Blog, as one lucky commenter will win a $20 prize!

Thank you for joining me today!

Take care,
Live, Laugh & Create

Monday, June 13, 2016

A Little Something for You Card


Hello & Thanks for joining me today!

For this weeks card, I stamped, watercoloured, embossed and inked the background with Distress Inks on watercolour paper. I then die cut the stamped image out using the Pierced Stacker #4 set. I placed a larger black cardstock die cut (from the same set) to cover the die cut hole. 

I then layered the stamped image on top. I inked a variety of foliage die cuts with Distress Inks and placed in the bottom left and top right corners. I used the Build a Flower #2 to create my large flower and the Embellishment #2 for the small buds.


My Sentiment Frame was also cut from watercolour paper and inked to match the background. I stamped and embossed my sentiment in black. Added a few rhinestones to the center of the flowers and stamping.

I hope you will play along in our Cheery Lynn Designs ChallengeYou could win a $20 shopping spree at the online Cheery Lynn Designs store.

Thank you for joining me today!
Take care,
Live, Laugh & Create

Friday, June 3, 2016

Friends Card with Corina Finley

Hello!


Back again today with a card to share, that I have created using the 3D Peacock die for inspiration. The Peacock die is from Cheery Lynn Designs Mays New Release and has so much beautiful detail. 


I cut most of the layers for my card from a large piece of watercolour paper that I inked and sprayed with Distress Stain and Glimmer Mist. I cut a circle and card base from black cardstock. For the 3D effect on the Peacock, I bent up along the detailed cuts and embossed areas. I also added Stickles and a Turquoise glaze to the body for shine.


Dies Used:

A2 Frames Rectangular Classic (Set of 7) - CM-5


I hope you will play along in our Cheery Lynn Designs ChallengeYou could win a $20 shopping spree at the online Cheery Lynn Designs store.

Thank you for joining me today!
Take care,
Live, Laugh & Create

Thursday, May 26, 2016

Lots of Layers Card


Hello to you!

Today's card post is inspired by the Cheery Lynn Designs new challenge theme 'Lots of Layers'. Creating a multi layered base, sentiment and of course the layered Flowers all give the card dimension and depth.


For the Shasta Daisy, I only applied a little bit of Yellow dye ink with a finger dauber to the center of each layer of the flower. For the Chrysanthemum, I applied a heavier amount of yellow ink with a blending tool to each layer and then gentle added a dark orange dye ink to the ends of the petals. 


I adhered pearl beads to the center of the Shasta Daisy and Baby's Breath using Glossy Accents for dimension. Also tucked in the Olive Branch cut from white cardstock for foliage.


Dies used:

Tags #2 (Set of 4) - CABD-98


I hope you will play along in our Cheery Lynn Designs ChallengeYou could win a $20 shopping spree at the online Cheery Lynn Designs store.


Thank you for joining me today!
Take care,
Live, Laugh & Create

Thursday, May 19, 2016

Give Flight to your Dreams Card

Hello!

Today, I have a card to share with you using the Fab Cheery Lynn Design dies. I love creating cards with this colour combination it works for so many different occasions. Also using the frame dies like the Chicken Wire on the base of a card easily gives depth to your card.
I used the Sweet ChristineTea Rose Medium and the Judy's Blooms with a center from the Embellishment #2 set. Added pearls to the centers and tucked in the Olive Branches and Wheat Heads for foliage. 

The stamped image was cut with the Circles Shape, layer on top of the Scalloped Circle and then on to the Horizon Circle Boutique Stacker Frame. The Horizon Circle was inked with Gathered Twigs Distress Ink and highlighted with a glitter pen.
The Butterfly was die cut from white cardstock and I used a blue Glimmer Mist Spray to add colour. I backed the Butterfly with a light Kraft sprayed cardstock. Layered up onto the Horizon Fishtail Banner and the stamped label trimmed from the Paris Signs 4 die. I added small pearls to the die cuts.
Dies used:
I hope you will play along in our Cheery Lynn Designs ChallengeYou could win a $20 shopping spree at the online Cheery Lynn Designs store.

Thank you for joining me today!
Take care,
Live, Laugh & Create

Sunday, May 15, 2016

Cheery Lynn May Release Blog Hop!

Hello! 

I hope you are enjoying the blog hop for the Cheery Lynn Designs May New Release! 

I have used three New Release dies on my card, the Cherry Blossom BranchYou’re The Best Oval sentiment and the Quatrefoil A2 Frame 1. I have used the Quatrefoil in two different ways, once as a die cut and once as a stencil using one of my favourite techniques.

I cut the Quatrefoil out in white cardstock and place it down on my kraft layer like a stencil. Using an Ink Blending tool, I blended white ink over the entire stencil. Then moved the stencil alittle to the left and up - offsetting it. Once again I used an Ink Blending tool to apply Peacock feathers and Faded Jean Distress Ink over the top of the stencil. I then removed the stencil, leaving a great design on my kraft paper. I also used the "Stencil" on my bottom layer - perfect colour match!
If you are following Cheery Lynn Designs blog hop then you should have just came from Amy's blog (www.amyvoorthuis.blogspot.comand saw the beautiful creation she has done for this hop.
Above you can see a close up on the new Cherry Blossom Branch. I cut it out twice in white cardstock. Inked one with Faded Jeans Distress ink and trimmed out the blossoms. Layered the blossoms on top of the white die cut and added dark blue pearls to the center of each bloom.

I also inked the You’re The Best Oval with Faded Jeans Distress Ink and layered it on to dark blue cardstock. Trimmed it out and layered to a Scalloped Oval cut from white cardstock.
New Release Dies used:

Quatrefoil A2 Frame 1

Previous Release Dies used:

You are going here next: Bonnie: www.maketime2craft.com/

Remember to leave a comment at the end (I love comments too!) of the Blog Hop on the Cheery Lynn Blog, as one lucky commenter will win a $20 prize!

Thank you for joining me today!

Take care,
Live, Laugh & Create

Thursday, May 12, 2016

Red, White and Blue Card

Hello,

Thank you for stopping by! I have created a tag to share this week using last months new release States & Province dies. As you might already know I am Canadian and live in British Columbia. 

Alberta has been in the news lately, due to a terrible forest fire that has evacuated 90,000 + people. Some have lost their homes and jobs. They still are not allowed to return back to see what pieces they will have to pick up. Absolute tragedy. My heart goes out to each and every one of them. 
I don't normally blog about non crafting events, but this tragedy has stayed on my mind alot. I actually created this Tag a few weeks back and looking at the sentiment now - it takes on a new meaning to me. As all around me in my small town, people are having fundraisers, donating money, clothing, food, baby supplies, animal food & crates. That is what it is like in most of the BC Towns and Cities. All coming together to support fellow Canadians. Fort McMurray is not going to be beaten by this. 
Dies used:

Alberta - B755

Chain Mesh Border (Steampunk Series) - B358


I hope you will play along in our Cheery Lynn Designs ChallengeYou could win a $20 shopping spree at the online Cheery Lynn Designs store.

Thank you for joining me today!
Take care,
Live, Laugh & Create

Thursday, May 5, 2016

Live, Dream, Love Card

Hello!

Thank you for joining me today. I have created a simple vintage card that could be used for a variety of occasions.

I used the A2 Frames Rectangular for the base and top layer. I cut two rectangles from Kraft cardstock. The third layer edge is paper distressed and the second layer was embossed using the Burlap Embossing Plate.


I layered two of the Coved Rectangle die cuts. I cut the largest out of black patterned paper and added detail using the Coved Rectangle Stitch die. I stamped my sentiment on the Coved Rectangle cut one size smaller and heat embossed in black.

For my border along the top, I cut strips of pattern paper, layered them and added the Anastasia Border to the top and bottom. Wrapped twine around it and tied in a bow.


Dies used:
I hope you will play along in our Cheery Lynn Designs ChallengeYou could win a $20 shopping spree at the online Cheery Lynn Designs store.

Thank you for joining me today!
Take care,
Live, Laugh & Create

Thursday, April 28, 2016

Mothers Day Card


Hello!

Thank you for me! For today's post, I have created an inspiration card for the new challenge on the Cheery Lynn Design blog - Mothers Day.

Mothers Day is such a special day to show the woman/women in your life that you care. That you appreciate all they do. They may not be your birth mother but someone that is there for you, supports you in lifes ups & downs, and that you love!


Dies used:

Margarita Border - B432


I hope you will play along in our Cheery Lynn Designs ChallengeYou could win a $20 shopping spree at the online Cheery Lynn Designs store.

Thank you for joining me today!
Take care,
Live, Laugh & Create

Thursday, April 21, 2016

Misfit Card with Corina Finley

Hello!

Thank you for joining me today. For this weeks card post, I decided to create a card using my 'Misfit' cuts. These are the die cuts I have previously cut for another creation and cast aside!! I store these die cuts all together in a container and they always come in handy. As I cut 75% of my die cuts from white cardstock, it is easy to ink to any colour palette.


Here I have layered the one of the Small Exotic Butterflies #2 die. The layer underneath is vellum and gives the butterfly more depth. I inked the top layer with purple Distress Ink, added Clear Wink of Stella and purple rhinestones for a touch of glitter.


Dies used:

Royal Scandinavian Boutique Stacker A2 Frame - DL313


I hope you will play along in our Cheery Lynn Designs ChallengeYou could win a $20 shopping spree at the online Cheery Lynn Designs store.

Thank you for joining me today!
Take care,
Live, Laugh & Create

Friday, April 15, 2016

April New Release Blog Hop

Hello! 

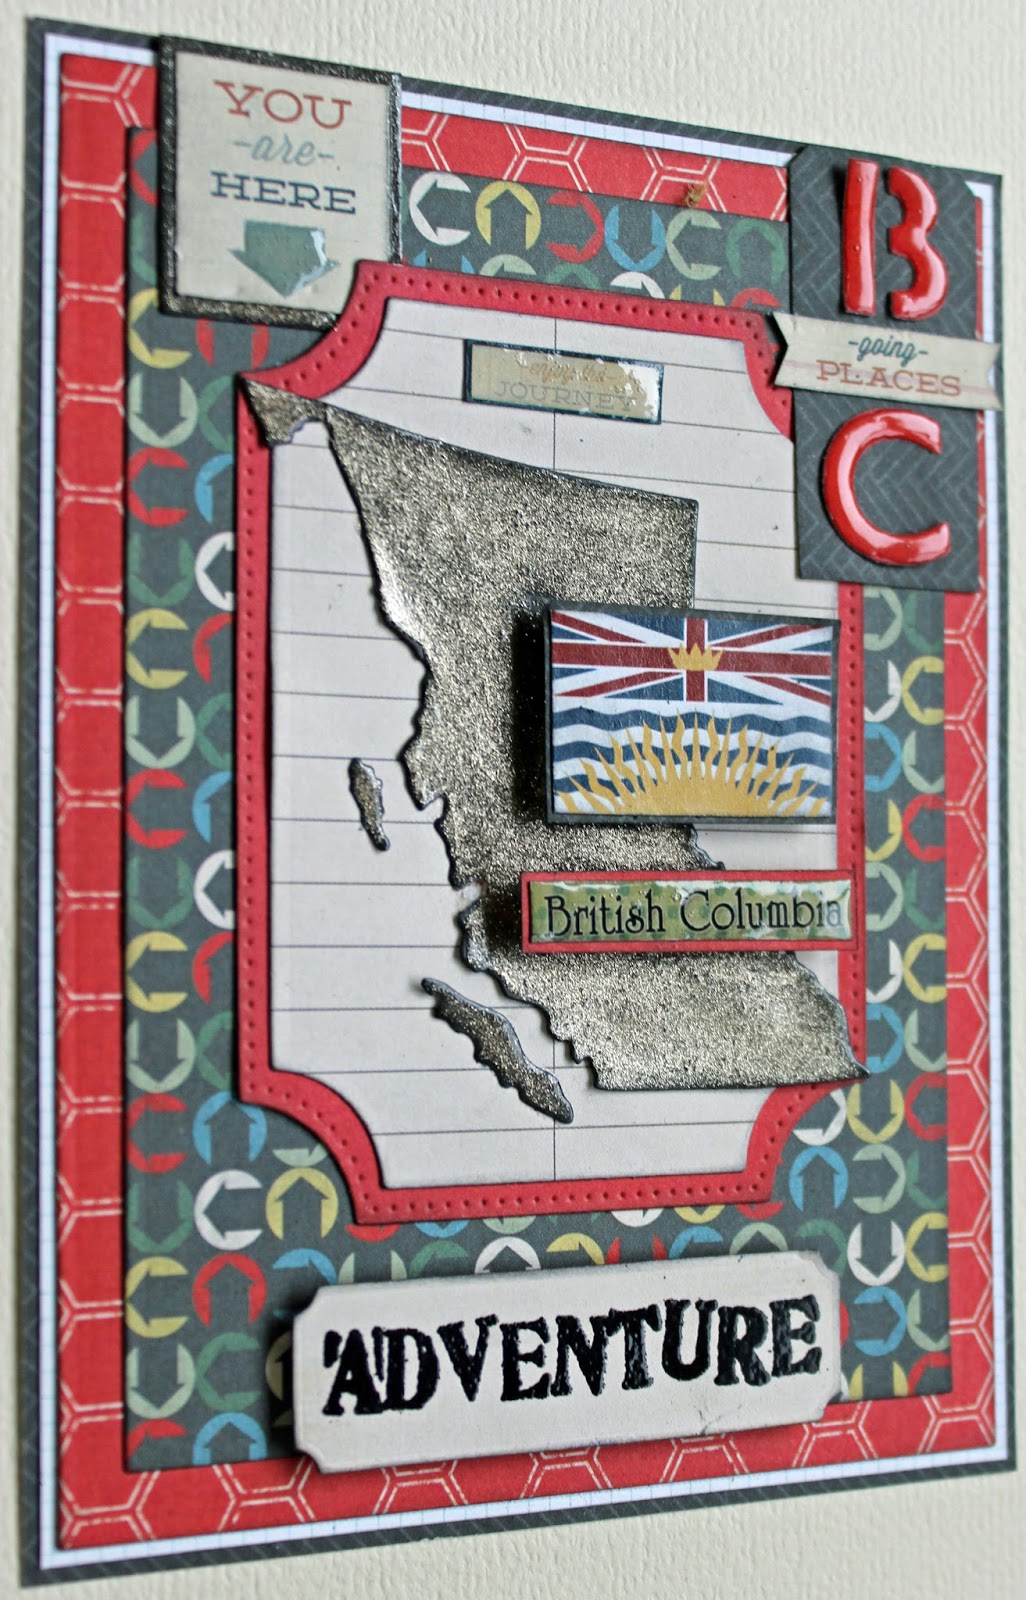
I hope you are enjoying the blog hop for the Cheery Lynn Designs April New Release of US States and Canadian Provinces & Territories dies. As I am a proud Canadian, my card is inspired by my home province of British Columbia.


If you are following Cheery Lynn Designs blog hop then you should have just came from Amy's blog (www.amyvoorthuis.blogspot.comand saw the beautiful creation she has done for this hop.


As you can see above from the picture on the right, the die set comes with the layout of British Columbia and the abbreviation for the name - BC.

I know I will be using the British Columbian die in my journal and scrapbook layouts to show the location of my travels within BC.

*Just in case you got lost along the way, this link takes you back to the beginning!
Cheery Lynn Designs Blog: cheerylynndesigns.blogspot.com


Dies used:
You are going here next: Bonnie: www.maketime2craft.com/

Remember to leave a comment at the end (I love comments too!) of the Blog Hop on the Cheery Lynn Blog, as one lucky commenter will win a $20 prize!

Thank you for joining me today!

Take care,
Live, Laugh & Create