Monday, August 1, 2016

Coffee is the Way to my Heart!


Hello All!

Happy August 1st & Welcome back to the blog! For todays post, I will be sharing a card about one of my favourite things........Coffee! I love it and need it to function! 

When I saw these Paper Coffee Cups, I purchase two packages! I have a Tim Hortons gift cards inside this card to be given to a special friend - she is a fellow addicted coffee drinker! 

For the card background, I used the Intersecting Circles Stencil in 6x6 size (also available in 3x3 and 12x12) with Texture Paste tinted with Distress Ink in Ground Espresso. 


I matted the Coffee Pattern Paper with Black cardstock and distressed the edges. I painted the medium sized Paper Coffee Cup and the Vintage Clock with Distress Paint. I added the burlap and the Coffee/Java Circle to the Chipboard Cup.

I adhered the arrow "THE WAY TO MY HEART" to the card front and coloured with a Stardust pen. For a finishing touch I added coffee beans with a glue gun and tucked burlap in to the base of my card.

Southern Ridge Products used:

Intersecting Circles Stencil


Remember to play along in the new monthly challenge that starts today on the Southern Ridge Trading Company blog. Each month enter for your chance to win 4 designs from the online store - chipboard.ca -$20 (before tax) retail value of YOUR OWN CHOOSING! 

Thanks for joining me today!

Take care,
Corina Finley

Live, Laugh & Create!

Monday, July 18, 2016

Golden Birthday Card

Hello!

Hope everyone is having a great summer! I have been enjoying the summer with my family and have had guests for the last three weeks.

I created this Golden Birthday card for a close friend of mine. A Golden Birthday year is the year that the age a person is matches the date on which their birthday falls, e.g. a person who celebrates their birthday on the 31st of July will have a golden birthday in the year the person turn 31.
Above you can see the beautiful detailed Butterfly from the Butterfly Swirl Combo set. I painted both gold and heat embossed with a Gold sparkle embossing powder for an added shine!. 

The Happy Birthday Sentiment is from the Birthday Greeting set. I used Frantage embossing powder in Chunky Gold. This type of embossing powder "Chunky" has larger granules so your end result is thicker. 

The Vintage Oval Mirror and Flourish is embossed with a regular Frantage embossing powder in Vintage Pink. I absolutely love the look and texture this type of embossing powder gives the beautiful chipboard pieces.
Above is a close up of a variety of Paper Flowers that Southern Ridge carries. There are different colours, styles and types so make sure to click on the link and take a peek!

Southern Ridge Chipboard used:

Vintage Oval Mirror Fancy

Paper Flower Assortment

Remember to play along in the monthly challenge over on the Southern Ridge Trading Company blog. Each month enter for your chance to win 4 designs from the online store - chipboard.ca -$20 (before tax) retail value of YOUR OWN CHOOSING! 

Thanks for joining me today!

Take care,
Corina Finley

Live, Laugh & Create!

Monday, July 4, 2016

Imagination is Boundless Card

Hello!

I am back on the blog today with a Mixed Media Card. I love using various medias to creating layers and depth. My favourite media to use is chipboard embellishments. It allows me to alter and create in any colour palette I choose!

I layered Script Pattern Paper on top of Kraft and then Java Brown cardstock. I used my sewing machine to stitch just inside of the edge of the top layer of the Script Pattern Paper.

For the Ornate Oval Frame, I used Lumiere Paint in Old Brass. I then added Frantage Embossing Powder and brown glass fragments, here and there.  I stamped my sentiment for the center, using Black ink and heat embossed using Fine Detailed Embossing Powder in Black.
I adhered the Ornate Oval Frame to the center of my card. I used the Frantage Embossing Powder on the Squares Pattern before I cut into pieces and added them to the card front. I then arranged an assortment of Paper Flower and embellished with the small Leaf Sprigs.
Southern Ridge Chipboard used:

Squares Pattern


Remember to play along in the monthly challenge over on the Southern Ridge Trading Company blog. Each month enter for your chance to win 4 designs from the online store - chipboard.ca -$20 (before tax) retail value of YOUR OWN CHOOSING! 

Thanks for joining me today!

Take care,
Corina Finley

Live, Laugh & Create!

Friday, June 24, 2016

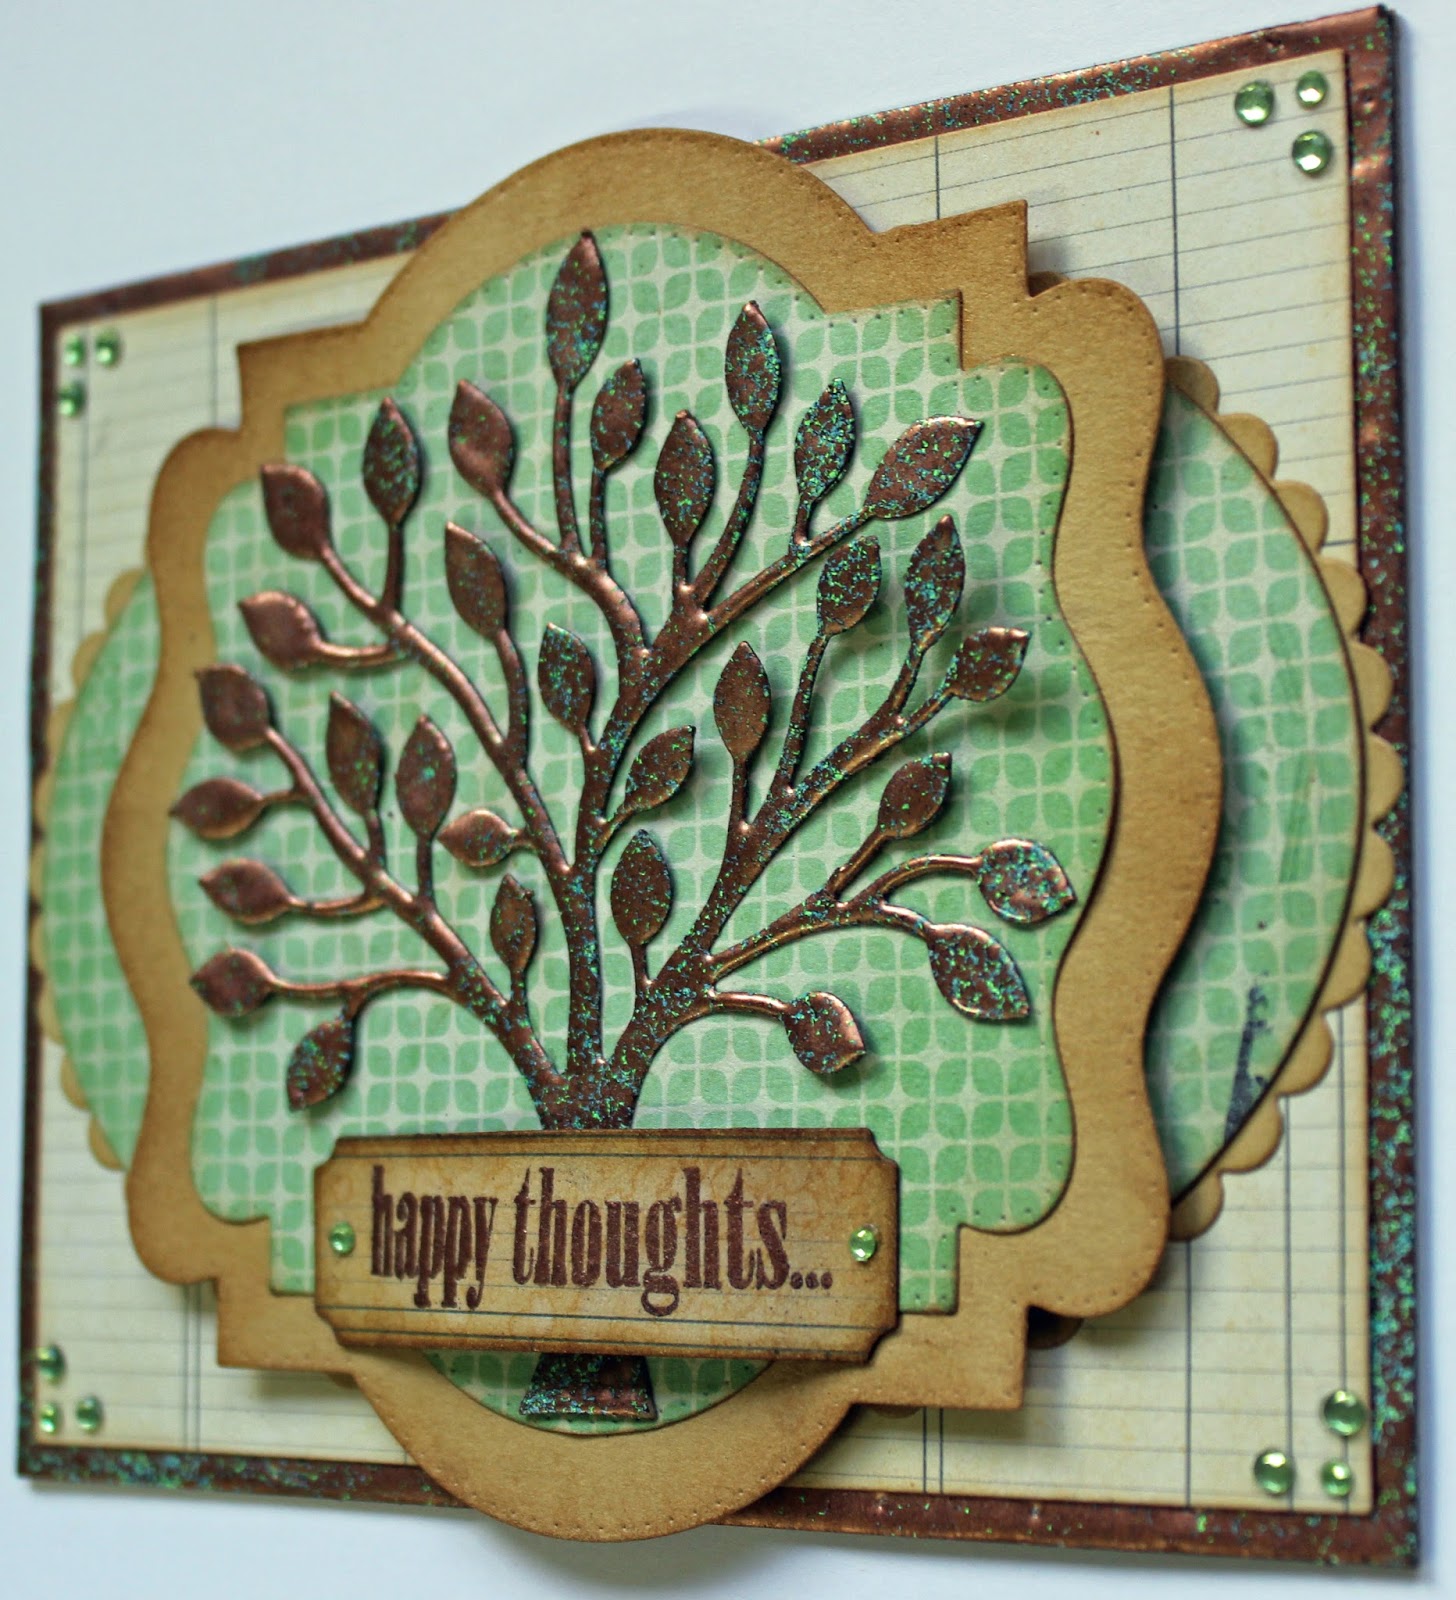
Happy Thoughts.....

Hello!

I just want to start off by letting you all know that I will be taking a leave of absense. I need to focus on my family and families health.

With that said, lets get to today's card! 

I die-cut the Whimsical Tree of Life (I am in love with the new Whimsical Tree of Life from the June Release! It will be great for all seasons themed cards!) from cardstock and heat embossed with Vintage Copper Frantage embossing powder.
I cut the A2 Frames Rectangular for the base from light weight chipboard and heat embossed the edges with Copper Vintage Frantage embossing powder. I matted the Lined pattern paper to the chipboard and used the A2 Frames Rectangular in one size smaller to cut it.

From Kraft cardstock, I cut the Pierced Stacker #3 and Scalloped Oval. I inked the edges with Vintage Photo Distress Ink. I then cut my green pattern paper with a smaller die from each of the two sets and matted them to the larger Kraft die-cuts.

I stamped my Happy Thoughts sentiment onto the Paris Signs 4, heat embossed with Copper embossing powder and trimmed the die-cut. Inked the edges with Vintage Photo Distress Ink. To accent, I added the green rhinestones to the sentiment and corners.

Whimsical Tree of Life Die - B798


I hope you will play along in our Cheery Lynn Designs Challenge. You could win a $20 shopping spree at the online Cheery Lynn Designs store.

Remember that I am sending you 'Happy Thoughts' till next time!

Thank you for joining me today!
Take care,
Live, Laugh & Create

Wednesday, June 15, 2016

Cheery Lynn Designs Whimsical Delights Blog Hop!

Hello! 

Thank you for joining me and I hope you are enjoying the blog hop for the Cheery Lynn Designs June New Release Whimsical Delights!

If you are following Cheery Lynn Designs blog hop then you should have just came from Amy's blog: amyvoorthuis.blogspot.com and saw her beautiful creation!
To create my card, I cut a piece of Kraft cardstock with the Rectangle Stitch and Cut die. Then painted the entire panel with Robin Egg Blue acrylic paint. Once dry, I embossed the panel with the Wood Grain embossing plate. Using a sanding block, I removed the paint on the embossed area only - giving the panel a two toned look. I layered this onto a Java Brown card base.
Above you can see a close up on the new Whimsical Owl Die. He has been cut from Core'dinations cardstock and roughly sanded to reveal the great detail.  I used two jeweled brads for the eyes. 

I decided to add the nest under the owl from the Bird Nest And Eggs set. I also used the core'dinations cardstock for it. For the top of the nest, I cut it out twice from Kraft cardstock and applied some Patina glitter glue with my finger tip for some sparkle!

The Pierced Banner sentiment was cut from Kraft cardstock and roughly painted with Robin Egg Blue acrylic paint. Once dry, I stamped and embossed in black. I then added the same Patina Glitter Glue to the letters.
New Release Dies used:

Cheery Lynn Designs - Whimsical Owl Die - B789

Previous Release Dies used:

Rectangle Stitch and Cut Tool - LG Silver Stitch Tool - LSC-16


You are going here next: Ginny @ pollyspaper.wordpress.com

Remember to leave a comment at the end (I love comments too!) of the Blog Hop on the Cheery Lynn Blog, as one lucky commenter will win a $20 prize!

Thank you for joining me today!

Take care,
Live, Laugh & Create

Monday, June 13, 2016

A Little Something for You Card


Hello & Thanks for joining me today!

For this weeks card, I stamped, watercoloured, embossed and inked the background with Distress Inks on watercolour paper. I then die cut the stamped image out using the Pierced Stacker #4 set. I placed a larger black cardstock die cut (from the same set) to cover the die cut hole. 

I then layered the stamped image on top. I inked a variety of foliage die cuts with Distress Inks and placed in the bottom left and top right corners. I used the Build a Flower #2 to create my large flower and the Embellishment #2 for the small buds.


My Sentiment Frame was also cut from watercolour paper and inked to match the background. I stamped and embossed my sentiment in black. Added a few rhinestones to the center of the flowers and stamping.

I hope you will play along in our Cheery Lynn Designs Challenge. You could win a $20 shopping spree at the online Cheery Lynn Designs store.

Thank you for joining me today!
Take care,
Live, Laugh & Create

Friday, June 3, 2016

Friends Card with Corina Finley

Hello!


Back again today with a card to share, that I have created using the 3D Peacock die for inspiration. The Peacock die is from Cheery Lynn Designs Mays New Release and has so much beautiful detail. 


I cut most of the layers for my card from a large piece of watercolour paper that I inked and sprayed with Distress Stain and Glimmer Mist. I cut a circle and card base from black cardstock. For the 3D effect on the Peacock, I bent up along the detailed cuts and embossed areas. I also added Stickles and a Turquoise glaze to the body for shine.


Dies Used:

A2 Frames Rectangular Classic (Set of 7) - CM-5


I hope you will play along in our Cheery Lynn Designs Challenge. You could win a $20 shopping spree at the online Cheery Lynn Designs store.

Thank you for joining me today!
Take care,
Live, Laugh & Create