Friday, November 28, 2014

Noel Card


Hello! 

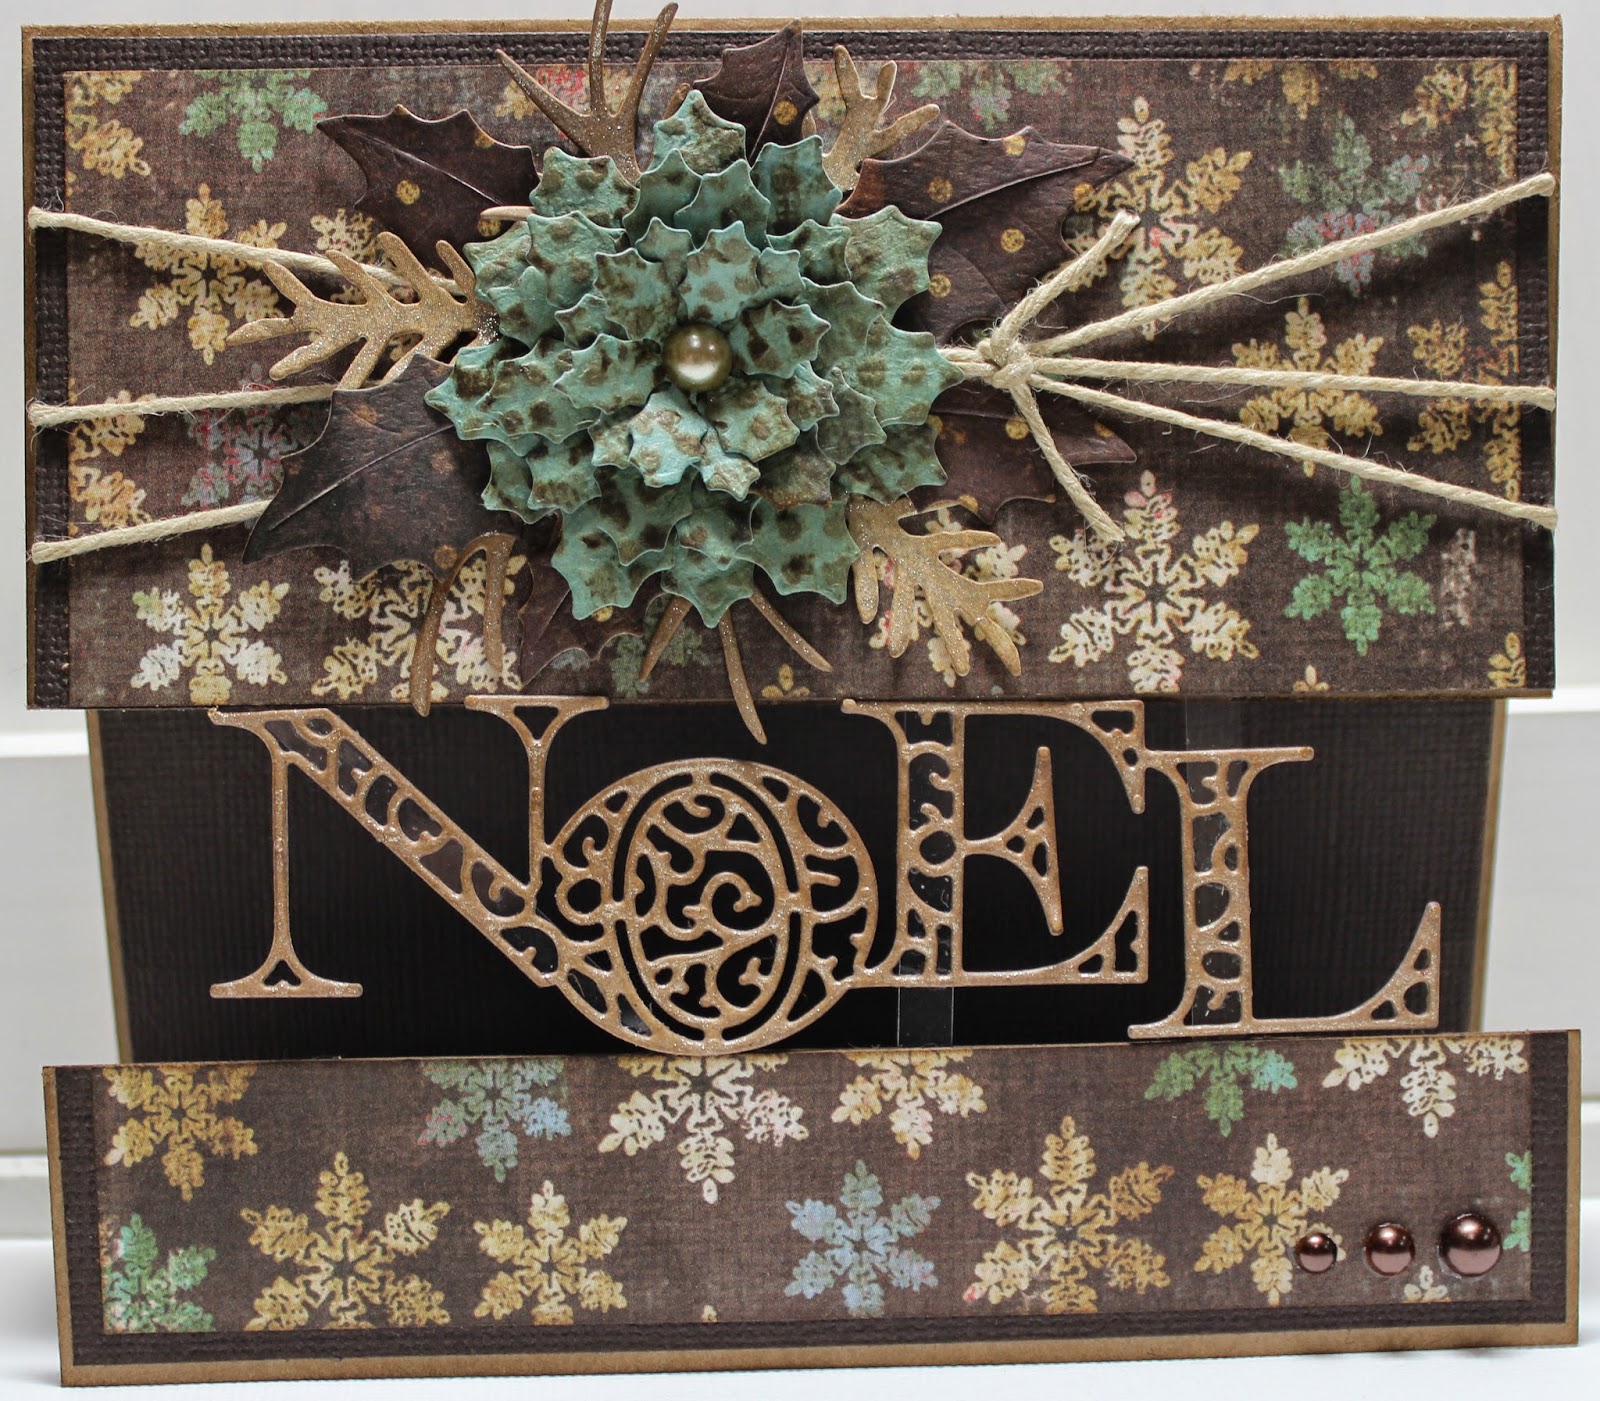
I have seen this style of card before with assorted word die cuts. When I saw the decorative Noel die from Cheery Lynn Designs, I knew I had to give this "Floating Word" card design a try!

I made the base of the card from Kraft card stock. I then matted with a layer of dark brown card stock and snowflake decorative paper. I cut the Noel die out of Kraft and measured the die cut vertically (from the top of the N to the bottom of the O). That measurement is the complete section that you will remove from the front of the card (see above picture for visual).


As you can see from the above picture: I cut three strips of medium weight acetate to give the die cut strength but also to attach the three sections together. The acetate runs diagonally behind the N and vertically behind the E and L. The acetate is sandwiched between the Kraft and dark brown card stock.


I created my Poinsettia using the Poinsettia Strip die. I inked and embossed the petals with the Burlap Embossing Plate. I then inked the top of each petal with brown ink to highlight the embossed impression.


Dies Used:
Poinsettia Strip - B324

Holly Leaves - B183


I hope you will play along in our weekly Cheery Lynn Designs Challenge 160 - Non-traditional Christmas Colors. You could win a $20 shopping spree at the online Cheery Lynn Design Store

Thanks for joining me today!

Take care,
Corina Finley

Live, Laugh & Create!

Friday, November 21, 2014

Holly Christmas Card


Hello! 
I wanted to share my Christmas Card and also a technique that I use when I have pattern paper or an image that does not fit the size/die shape that I want to work with! 


I wanted to use the piece of pattern paper that you see in the picture above. I selected 2 of the 3 dies from the Madrid Flourishes Rectangle Boutique Stackers Frame set and card stock to match.


I die cut one medium and two of the small Madrid Flourishes Rectangle Boutique Stackers Frame. I set the medium Kraft die cut aside.


I overlapped the 2 small Madrid Flourishes Rectangle Frames to the size of my image. I marked with a pencil and then used a Craft Knife and a ruler to trim away excess/overlapped card stock.


I used a piece of the excess scrap card stock to adhere both beside each other. I did allow the very outside border to stay overlapped. It allowed me to glue them to each other and stay stable. 


Perfect sized border - it is hard to see that it started off as 2! I die cut the Christmas sentiment and embossed with vintage copper embossing powder. I finished the card off by creating Holly which I used rhinestone for berries. 


Dies used:

Holly Leaves - B183


I hope you will play along in our weekly Cheery Lynn Designs Challenge 159 - Tag You're It. You could win a $20 shopping spree at the online Cheery Lynn Design store.

Thanks for joining me today!

Take care,

Live, Laugh & Create!

Friday, November 14, 2014

Merry Card


Hello, 

I am sharing my first Christmas Card of the season with you all! I absolutely love traditional Holiday colours, the golds, silvers, reds and greens! 

I used three of the Scalloped Coved Rectangle stacker dies to create the base of the card. Each die was larger than the paper layer that I cut. I placed the die so that only the right side was touching the paper - so that only the right side cut. I did this on each layer. 


I cut my Felicity Doily w/ Angel Wing and cut it in half and adhered it to the left side of my card on top of my base.

I created depth and interest by layering all the foliage/greenery under my Poinsettia. Using various colours of green cardstock to distinguish each layer.


I used only Merry from the Merry Christmas w/Tree Sentiment die. I used red glitter glue on the die cut to make it shine!

Dies Used:
You could win a $20 shopping spree at the online Cheery Lynn Designs store

Thanks for joining me today!

Take care,

Live, Laugh & Create!

Friday, November 7, 2014

Get Well Soon Card


Hello Hello!!

It is November!! Wow, how time has flown by!

Here in British Columbia, Canada, we have a lot of rain during Fall. Then the rain turns into snow - it has snowed twice already - very lightly but has not stayed!

My card palette was inspired by the weather. With a little 'bling' shine for the few rays of sun that peek through now and again!


I used the Florence Filigree Doily from the Octobers release to draw your eye into the center. The New Release Doily dies are really versatile and once you try them - you will be hooked! 


Dies Used:

Tags 4 - B263


I hope you will play along in our weekly Cheery Lynn Designs Challenge 157 - Give Thanks
You could win a $20 shopping spree at the online Cheery Lynn Designs store

Thanks for joining me today!

Take care,

Live, Laugh & Create!

Saturday, November 1, 2014

Basic Tool Kit

Hello

I thought that I would re-post the basic tool kit needed for classes at Paper Arts Studio.

By each student having the required tools, it keeps classes run smoothly and on time!

Thank you & Take care,

Corina Finley

Live, Laugh & Create!

Required Basic Tools Checklist:

  • Paper Trimmer
  • Paper Piercer
  • Scissors
  • Brown Ink Pad and Black (for distressing)
  • Ink Blending Tool
  • Craft Mat
  • Bone Folder
  • Stylus
  • Score Board
  • Adhesive (all):

              Sookwang (double sided tape) 5mm,
              Liquid Glue (Glossy Accents),
              Pop Dots,
              Tape runner
              Glue Dots